The last week or so in Houston has been pretty cold. I like cold weather clothes, but I hate being cold...so I've been pretty conflicted.
One day last week when I probably should have been studying, I was instead watching Food Network. It was some type of Anne Burrell show and she got me when I heard her say Fried Grilled Cheese.
Fried. Grilled. Cheese.
I'm still in shock at how delicious that sounds. I told my boyfriend that I wanted to make it and he told me I'm ridiculous...but I made them anyways. And he loved it.
This is your basic grilled cheese sandwich, but instead of just slapping on some butter and then pan frying it, you literally fry it. But after you treat your bread slices like french toast.
It's heaven. And because of the cold weather I mentioned, I decided I also needed a tomato bisque to go with it. This is my new favorite meal!

That's 3 slices of cheese (above), versus two slices of cheese (below). Hint: go with the three slices of cheese! Trust me.

I used my loaf recipe from earlier this week. I feel encouraged to make a loaf of bread at least once a week so that I can always have this bread and these sandwiches on hand.
Here are some tips:
1. I used block cheese that I cut slices off of - partially because it's cheaper, and partially because it's easier to control.
2. I also learned through trial and (I'm not counting it as because they still tasted good) error, that it's better to fry them for about 20-30 seconds and check them then to just let it go and fry and crisp them. Granted, if you like yours super crispy and kind of brown, then you'll want to fry for longer.
3. Have a plate with a napkin on it ready for when the frying is done to absorb any extra grease.
4. Tongs are amazing. and also the tooth picks. without the tooth picks, the top crust floats on it's own. Learn from my mistakes.
5. I liked using a pot because the grease didn't pop at me as much.
Gather -
plate with a double napkin layer
wooden spoon
tongs
two toothpicks per sandwich
~2T butter melted in a bowl
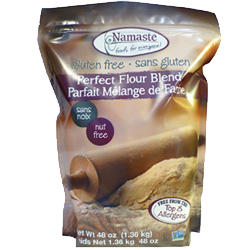
a handful of Namaste Foods Perfect Flour Blend in a separate bowl
two slices of bread
block of cheese - I used colby jack
vegetable oil
1. pour your oil into your pot/pan and begin heating at about medium high - I poured enough to be about 1/4" - 1/2" so that the lower slice of bread is mostly submerged in the oil.
2. take one slice of bread and coat both sides with flour.
3. from your block of cheese, cut 3 slices of cheese, about 1/4" thick.
4. take the same slice and coat both sides with butter, then place sliced cheese on top
5. take your second slice of bread and coat with flour, then with butter.
6. make your sandwich and put two toothpicks at opposite corners of the bread slices.
7. check your oil - place the bottom of the wooden spoon handle in the oil. if it boils, your oil is hot enough!
8. take your tongs and ever so lightly place your sandwich in the oil. it will immediately begin to boil and sizzle and make your mouth water (if it's not already).
9. after about 30-45 seconds, depending on your preference of doneness, take out the toothpicks and flip the sandwich over.
10. place toothpicks back in if you want - I did this, but I'm not positive it's absolutely necessary. can't hurt to do it anyways.
11. once done, place on your napkin/plate, then flip over to absorb the other side's oil.
12. place on serving plate and enjoy!
Fun Fact: my boyfriend said if he wondered if he loved me before, he would know for sure that he does now.
Let me know how it goes for you below!